
Capturing the perfect moment on a wedding day is essential, especially. However, low-light situations can pose a significant challenge even for experienced photographers. The key to overcoming these challenges lies in understanding camera settings such as aperture and focus and using the right equipment.
Using a flashlight or an open aperture can help capture details in low-light environments. For instance, during receptions or night events, using a flashlight can ease the situation and help you focus on your subject better. Full-frame cameras are ideal for reducing noise and blur in bad weather or low-light situations.
Experience is also crucial. Photographers with experience understand how to adjust camera settings quickly and efficiently while capturing every detail of the event. They know how to position themselves correctly, where to stand and what angle to shoot from.
When taking photos indoors, focusing on details is essential. It's important not only to capture moments but also to highlight small details that make each moment unique. Experienced photographers know how to do this effortlessly by adjusting their camera settings accordingly.
Tips and Tricks for Shooting in Small and Dark Wedding Venues
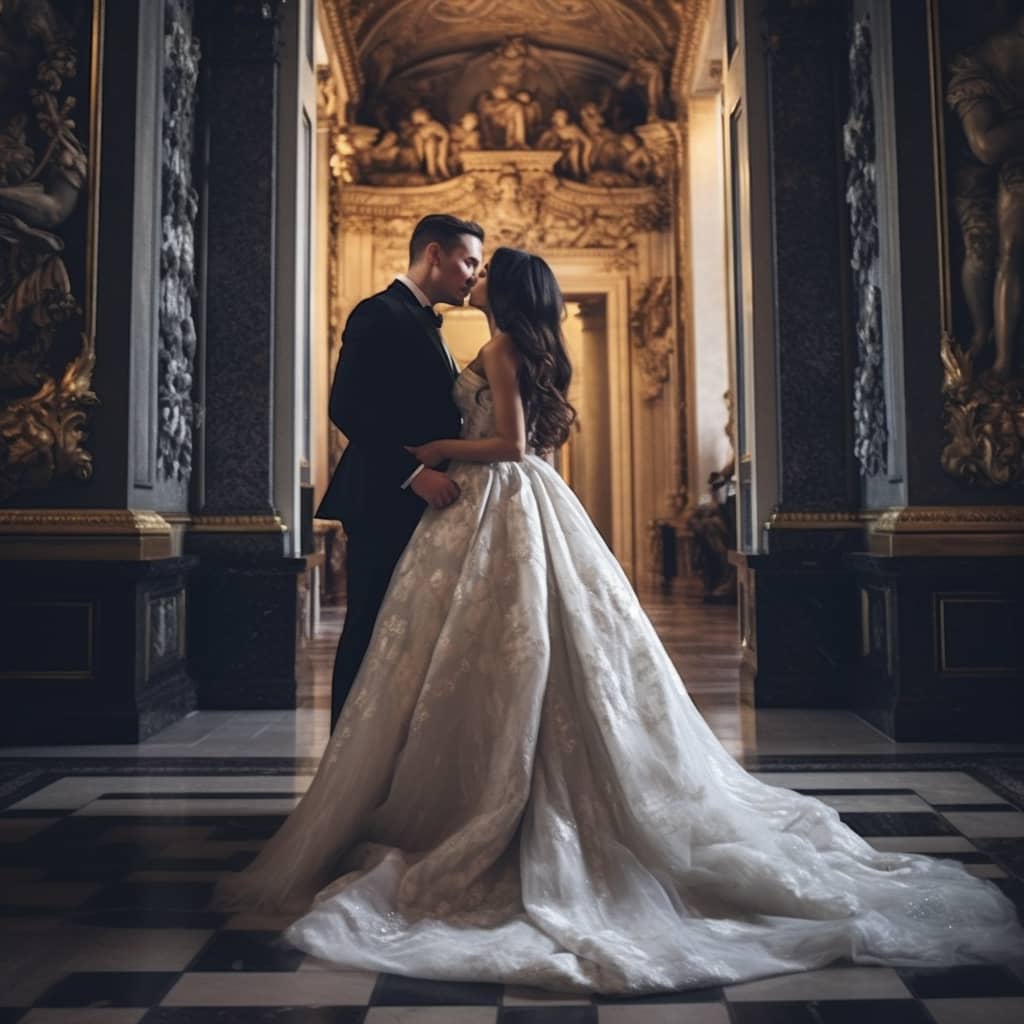
Shooting indoor wedding photography can be a challenge, especially when the venue is small and dark. But with the right tips and tricks, you can overcome these challenges and capture stunning images that will last a lifetime. Here are some of our top tips for shooting in small and dark wedding venues.
Use a Tripod to Stabilize Your Shots in Dark Wedding Venues
One of the biggest challenges of shooting in low-light environments is camera shake. When you're shooting with slow shutter speeds or high ISOs, even the slightest movement can cause your shots to come out blurry. That's why it's important to use a tripod to stabilize your shots.
A tripod will keep your camera steady and help you get sharp, focused shots even in low-light conditions. Look for a lightweight tripod that's easy to carry around with you throughout the wedding day.
Shoot in RAW Format to Capture More Details and Adjust Exposure Later
When shooting indoor wedding photography, it's important to capture as much detail as possible so you can adjust exposure later. Shooting in RAW format allows you to do just that.
RAW files contain all the data captured by your camera's sensor, which gives you more flexibility color balance, and other settings during post-processing. This means you'll be able to salvage underexposed shots or bring out details in overexposed areas without sacrificing image quality.
Increase Your ISO to Get a Brighter Image, but Be Mindful of Noise
Another way to compensate for low light is by increasing your ISO. This will make your camera more sensitive to light, which will result in brighter images. However, be mindful of noise when increasing your ISO.
Higher ISOs can lead to more noise (graininess) in your photos. To minimize this effect, try not to go too high with your ISO settings. Instead, use a combination of ISO, shutter speed, and aperture to get the right exposure for your shots.
Use a Slower Shutter Speed to Let in More Light, but Avoid Camera Shake for a Sharp Image
A slower shutter speed will let in more light, which can be helpful when shooting indoor wedding photography. However, as mentioned earlier, camera shake can be a problem when using slow shutter speeds.
To avoid camera shake, use a tripod or other stabilizing device whenever possible. You can also try bracing yourself against a wall or other solid object to steady your shot.
Final Thoughts
Shooting indoor wedding photography in small and dark venues can be challenging, but with these tips and tricks, you'll be able to capture stunning images that will last a lifetime. Remember to use a tripod to stabilize your shots, shoot in RAW format to capture more details and adjust exposure later, increase your ISO to get brighter images while being mindful of noise levels, and use slower shutter speeds while avoiding camera shake. With these techniques in mind, you'll be well on your way to capturing beautiful photos at any wedding venue.
Understanding Ambient Light and Its Impact on Low-Light Photography
Ambient light plays a crucial role in indoor wedding photography. It refers to the natural light present in a scene, which can significantly impact low-light photography. As a photographer, understanding lighting conditions is essential for producing high-quality images even in challenging indoor settings.
The Importance of Lighting Conditions
Lighting conditions affect the mood and atmosphere of an image. In indoor wedding photography, lighting can be particularly tricky as it is often limited and inconsistent. Photographers must be able to adapt to these conditions by adjusting their camera settings accordingly.
One way to overcome low-light environments is by using a wider aperture setting on your camera lens. This allows more light into the camera sensor, resulting in brighter images. Another option is to increase the ISO setting on your camera, which makes the sensor more sensitive to light.
Dealing with Backlighting
Backlighting can be a challenge in low-light environments but can also create stunning and unique photos if handled correctly. Backlighting occurs when the primary source of light is behind your subject, making them appear dark or underexposed.
To overcome backlighting, you can use flash or reflectors to add more light to your subject's face. Alternatively, you can adjust your camera's exposure compensation setting manually to brighten up your subject's face while still preserving the background details.
Mastering Ambient Light for Low-Light Photography
By mastering ambient light and its impact on low-light photography, photographers can produce high-quality images even in challenging indoor settings. One way to do this is by practicing with different lighting scenarios before shooting an actual event.
Another approach is by investing in quality equipment such as lenses with larger apertures or external flashes that provide additional lighting options. Learning how to read the histogram on your camera display will help you understand how much ambient light you need for each shot accurately.
Best Camera Settings for Capturing Clear and Vibrant Photos in Low Light
Low light environments can be challenging for photographers, especially. However, with the right camera settings, you can capture clear and vibrant photos even in low light conditions. Here are some tips to help you get the best results:
Use Slow Shutter Speeds
In low light environments, using a slow shutter speed is necessary to allow enough light into the camera. However, this can also result in blurry photos if there is any movement in the frame. To avoid this, use a tripod or stabilize your camera on a flat surface to reduce camera shake.
Consider Camera Sensor Size
The size of your camera sensor can affect how well it handles high ISO settings in low light conditions. Cameras with larger sensors tend to perform better at higher ISOs, resulting in less noise in your photos. If you're investing in a new camera specifically for indoor wedding photography, consider opting for one with a larger sensor.
Use Image Stabilization
Image stabilization is an essential feature that helps reduce blur caused by camera shake when using slower shutter speeds. Some cameras have built-in image stabilization systems that work by shifting the sensor or lens elements to compensate for any movement during exposure.
Choose a Wide Aperture Lens
Using a lens with a maximum aperture of f/2.8 or wider allows more light into the camera and results in brighter photos. This is particularly useful when shooting indoors where there may not be much natural light available.
Manually Focus Your Shots
Autofocus systems can struggle in low light conditions, resulting in missed shots or poor focus quality. To ensure you get sharp images every time, manually focus on your subject instead of relying on autofocus.
By following these tips and adjusting your camera settings accordingly, you'll be able to capture stunning indoor wedding photos even in challenging lighting situations. Remember to experiment with different settings and techniques to find what works best for you and your equipment.
Techniques for Fixing Bad Lighting During a Wedding Shoot
Indoor wedding photography can be challenging due to the lighting situation, which can often result in photos with color casts, blurry shots, and other issues. However, there are several techniques you can use to fix bad lighting during a wedding shoot.
Adjusting White Balance Settings to Correct Color Cast
One of the most common issues with indoor wedding photography is color cast. This happens when the light source has a different color temperature than your camera's white balance settings. To fix this issue, adjust your camera's white balance settings to match the light source.
For example, if you are shooting under tungsten light (which has a warm orange hue), set your camera's white balance to Tungsten or Incandescent mode. If you are shooting under fluorescent light (which has a cool blue-green hue), set your camera's white balance to Fluorescent mode.
By adjusting your white balance settings, you can correct colour cast and ensure that your photos have accurate colours.
Using a Tripod or Other Stabilization Techniques to Avoid Blurry Shots
Another challenge of indoor wedding photography is low light levels, which can result in blurry shots due to slow shutter speeds. To avoid this issue, use a tripod or other stabilization techniques such as image stabilization lenses or monopods.
A tripod will keep your camera steady and reduce camera shake, resulting in sharper photos. If you don't have access to a tripod, try resting your camera on a stable surface like a table or ledge.
Utilizing Off-Camera Flash or Reflectors to Add Additional Light
If the ambient light is too dim for good exposure even after adjusting ISO and aperture settings on the camera, consider using off-camera flash or reflectors. These tools add additional light that helps brighten up dark areas and create more depth in images.
Off-camera flashes allow photographers greater control over their lighting by allowing them to position the light source wherever they want. Reflectors, on the other hand, are a more affordable and portable option that can help bounce light back onto your subject.
Shooting in RAW Format to Have More Flexibility in Post-processing
Shooting in RAW format is always recommended. It gives you greater flexibility in post-processing by providing more data and information about each image. This means you can adjust exposure, white balance, and other settings without losing quality or detail.
RAW files also allow for better recovery of highlight and shadow detail than JPEG files. You can recover overexposed highlights or underexposed shadows without causing significant loss of quality.
Creative Use of Light Sources to Enhance Your Indoor Wedding Photos
Indoor wedding photography can be challenging due to low light situations, but a talented photographer knows how to use natural and artificial light sources to create ideal lighting for a wedding shoot. With the right light source, indoor wedding photography can be transformed into wild romantic photography, resulting in beautiful and natural photos.
Natural Light Sources
One of the best ways to enhance your indoor wedding photos is by using natural light. If your venue has large windows or skylights, take advantage of them! Position your subjects near the window or under the skylight and let the natural light illuminate their faces. This technique works especially well during golden hour - the time just before sunset when the sun casts a warm glow on everything it touches.
Another way to use natural light is by finding reflective surfaces such as mirrors or metallic objects that can bounce light onto your subjects' faces. This technique can create interesting shadows and highlights that add depth and texture to your photos.
Artificial Light Sources
When natural light isn't available or sufficient, artificial light sources can come in handy. One popular option is using off-camera flash. By positioning a flash off to the side of your subject, you can create dramatic shadows and highlights that add depth and dimensionality to your photos.
Another option is using ambient lighting such as candles or string lights. These types of lighting sources not only provide illumination but also create a cosy atmosphere that adds warmth and intimacy to your photos.
Combining Natural and Artificial Light
The most talented photographers know how to combine both natural and artificial light sources for stunning results. For example, if you're shooting in a dimly lit room with large windows, you could position your subjects near the window for natural backlighting while also using an off-camera flash for fill lighting on their faces.
Alternatively, you could use ambient lighting from candles or string lights as your main source of illumination while also using a flash to fill in any shadows or dark areas.
Latest Camera Equipment and Lenses for Low-Light Wedding Photography
Wedding photography is one of the most challenging genres of photography, especially. In such conditions, photographers need to have the right equipment and lenses that can help them capture stunning images without compromising on quality. Here are some of the latest camera equipment and lenses that wedding photographers can use for low-light photography.
Mirrorless Cameras with Full-Frame Sensors
Mirrorless cameras have become increasingly popular among wedding photographers due to their compact size, fast autofocus, and excellent image quality. They are also ideal for low-light photography because they allow more light into the camera sensor than traditional DSLRs. Full-frame sensors are particularly useful because they have larger pixels that can capture more light, resulting in better image quality even in dimly lit environments.
Canon's latest mirrorless camera, EOS R5, is an excellent choice for low-light wedding photography as it has a high ISO range of up to 102,400. This means that you can shoot in extremely low light conditions without worrying about noise or graininess in your images.
Prime Lenses with Wider Apertures
Prime lenses are fixed focal length lenses that do not zoom. They are preferred by many wedding photographers because they produce sharper images than zoom lenses and have wider maximum apertures that allow more light into the camera. The wider the aperture (represented by a smaller f-number), the more light enters the lens.
Canon EF 50mm f/1.2L and Canon EF 85mm f/1.2L lenses are popular choices among wedding photographers for low-light photography because of their wide apertures and sharpness. These lenses produce beautiful bokeh (blurred background) effects while keeping your subject sharp in focus.
Other prime lenses with wider apertures such as f/1.4 or f/1.8 can also be used for low-light wedding photography. These lenses are more affordable than their f/1.2 counterparts and still produce great results in low-light conditions.
Mastering Low-Light Wedding Photography Techniques
In conclusion, shooting indoor wedding photography in low-light environments can be challenging, but with the right techniques and equipment, you can capture beautiful and memorable photos. Understanding ambient light, using creative light sources, and having the latest camera equipment and lenses are all important factors to consider. Adjusting your camera settings and fixing bad lighting during a shoot can make a significant difference in the quality of your photos. Remember to practice and experiment with different techniques to find what works best for you. With these tips and tricks, you can master low-light wedding photography and produce stunning results that will delight your clients.
If you're looking to improve your skills in this area or want to learn more about low-light wedding photography techniques, there are many resources available online or through workshops and courses. Keep practicing and pushing yourself creatively to achieve even better results in the future!